
MARK HUMPHREY FARRIER remedial & surgical case studies
Pre-heading Text
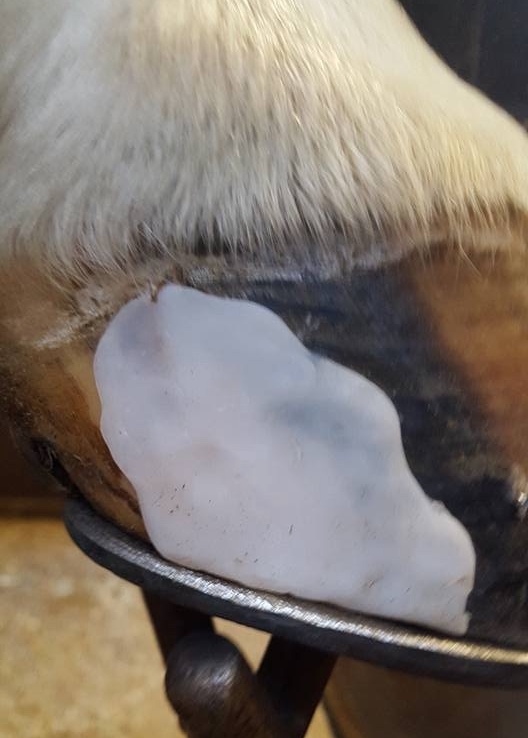
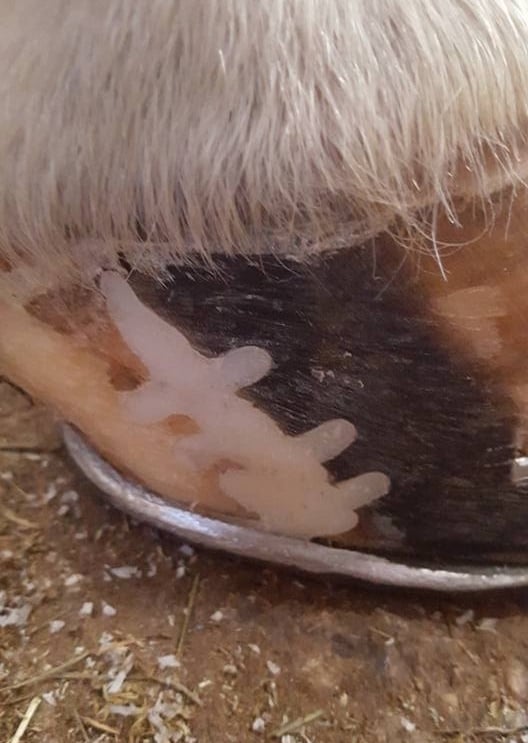
Quarter Crack Repair
The images below show a repair that we carried out to a complicated quarter crack. The quarter crack was cleaned, debrided and keyed ready for the drain to be made with imprint granules. We then fixed a straw in place and covered it with imprint granules to create the drain so the crack could be flushed out. Finally, Jameg hoof repair was moulded over the top of the drain to give extra strength in the area, the straw was removed and the area tidied for a clean finish.


working with the vets from home farm equine...
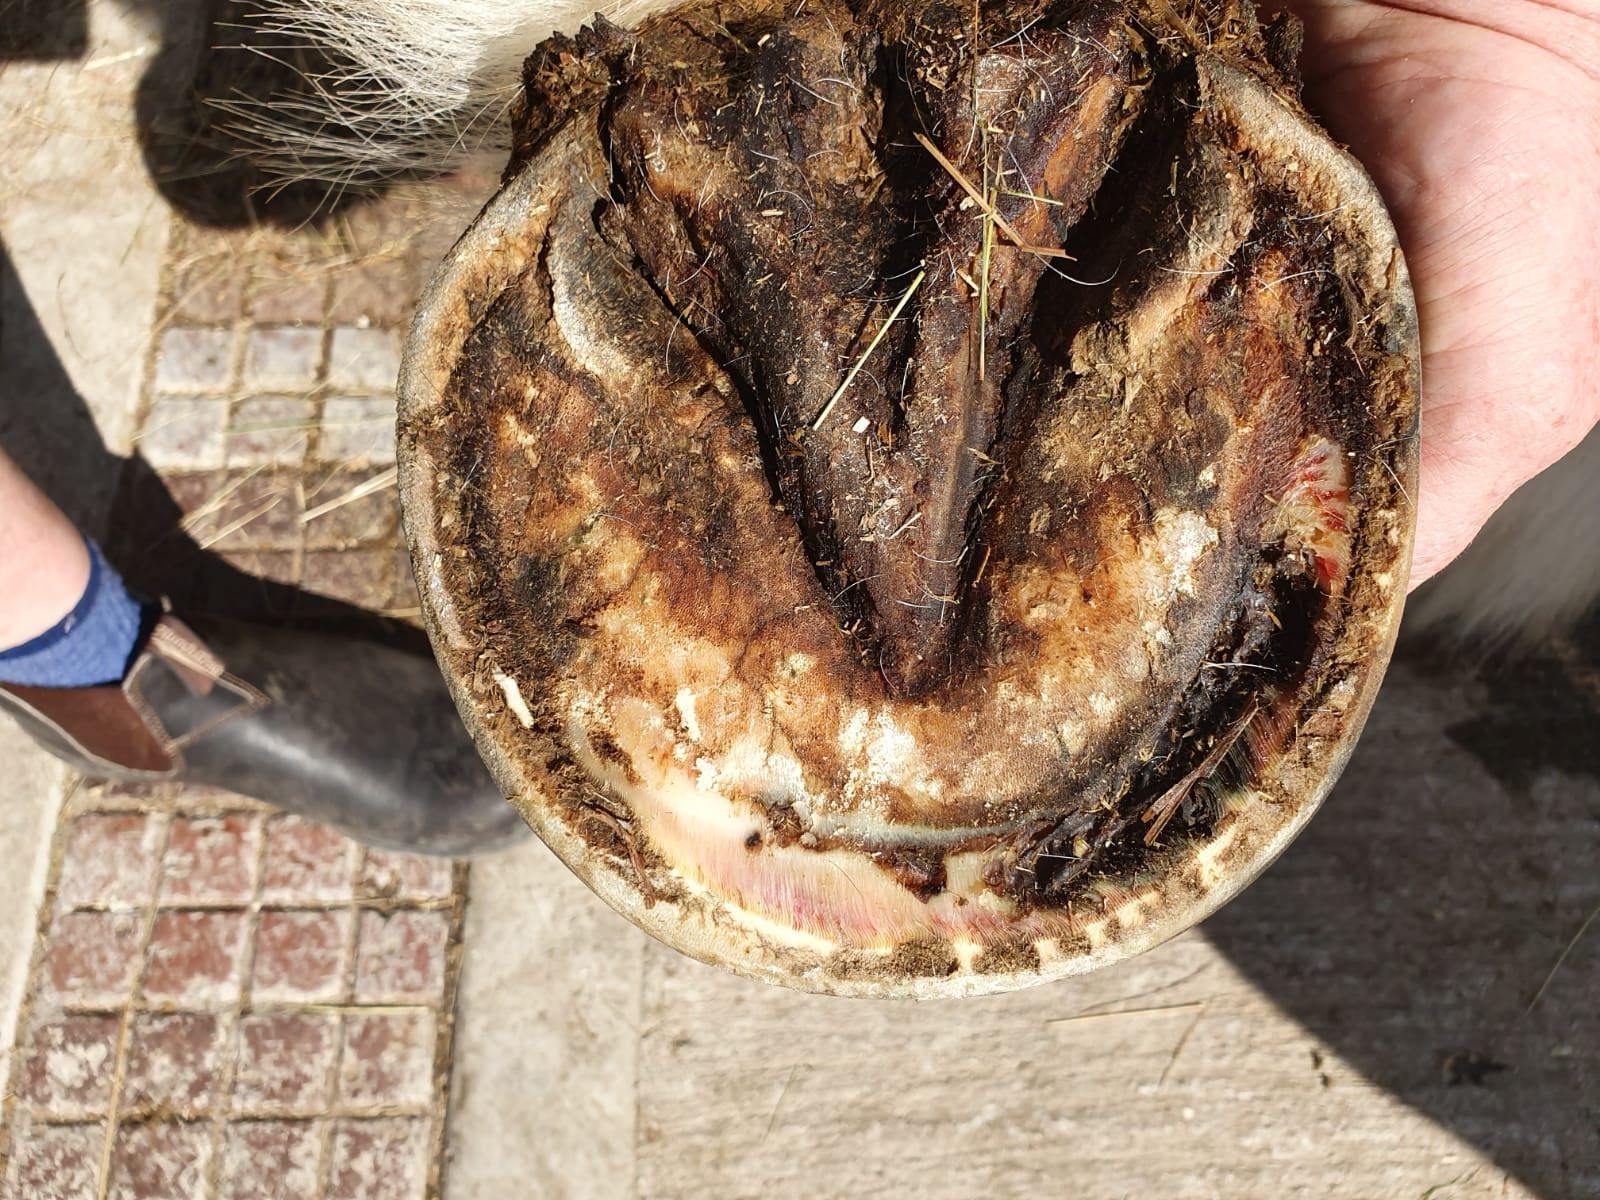
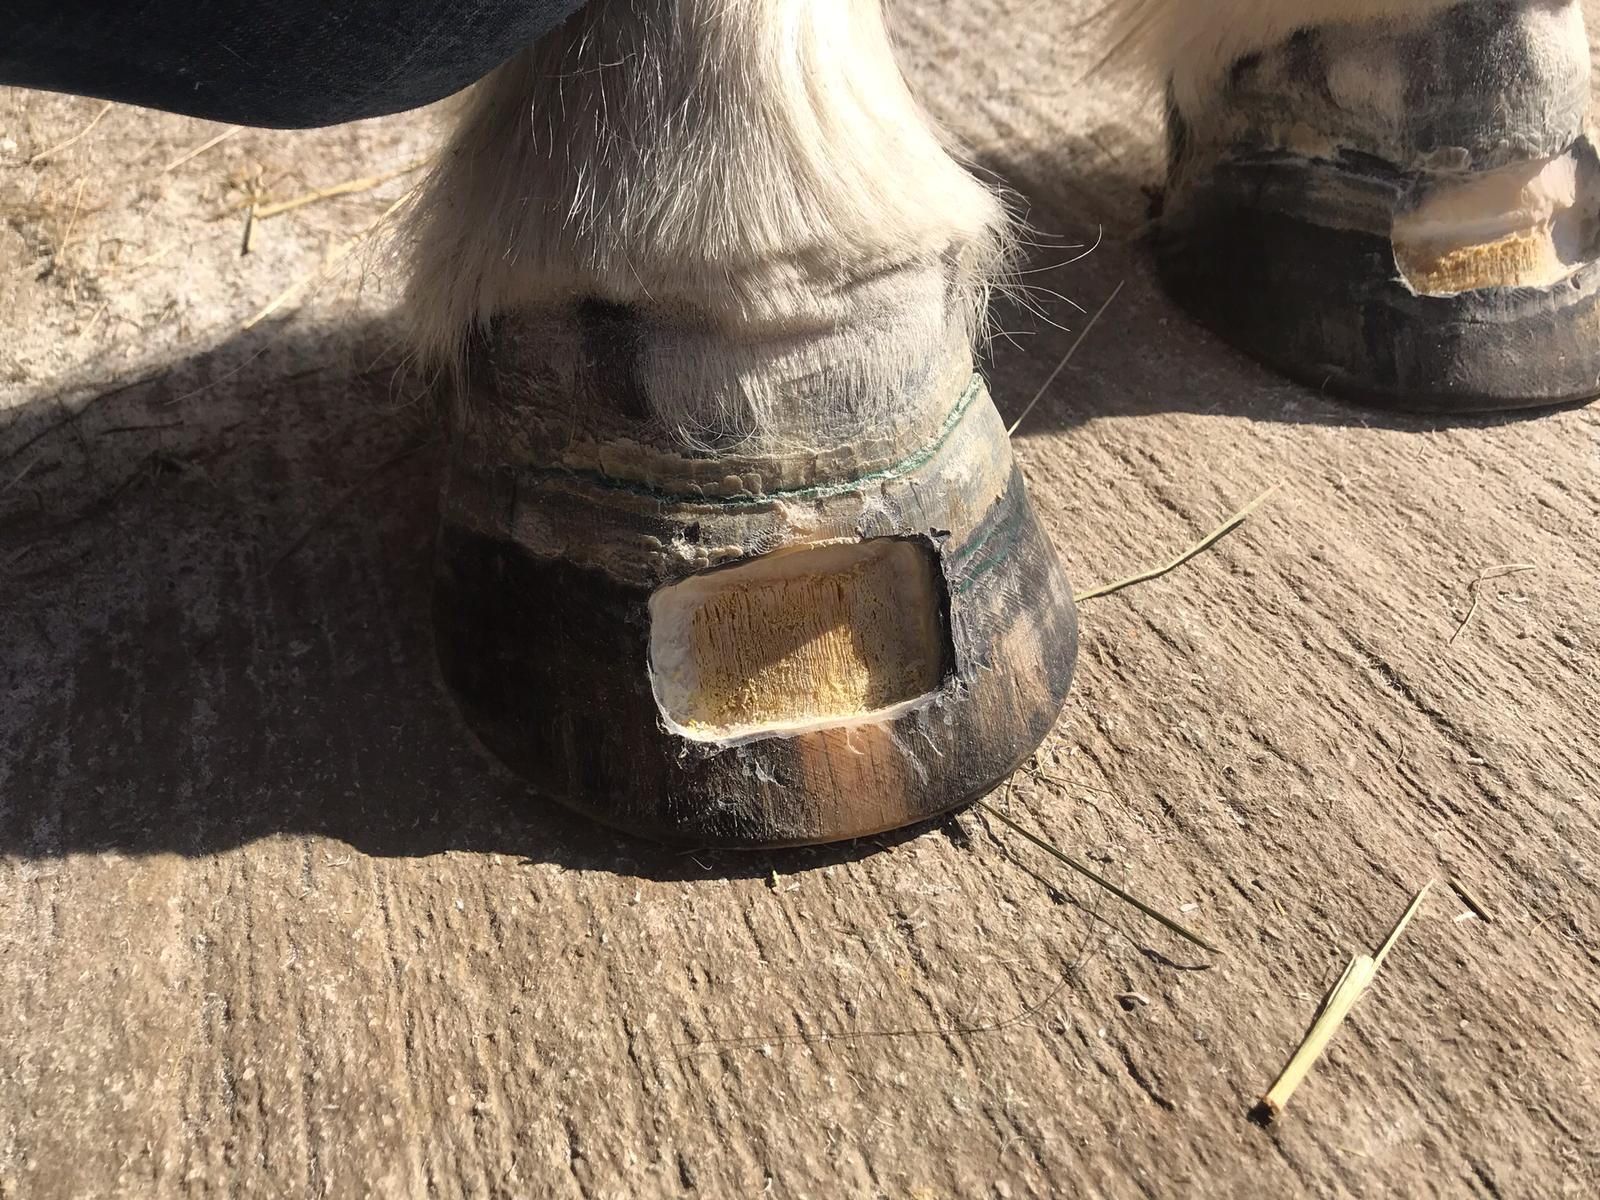
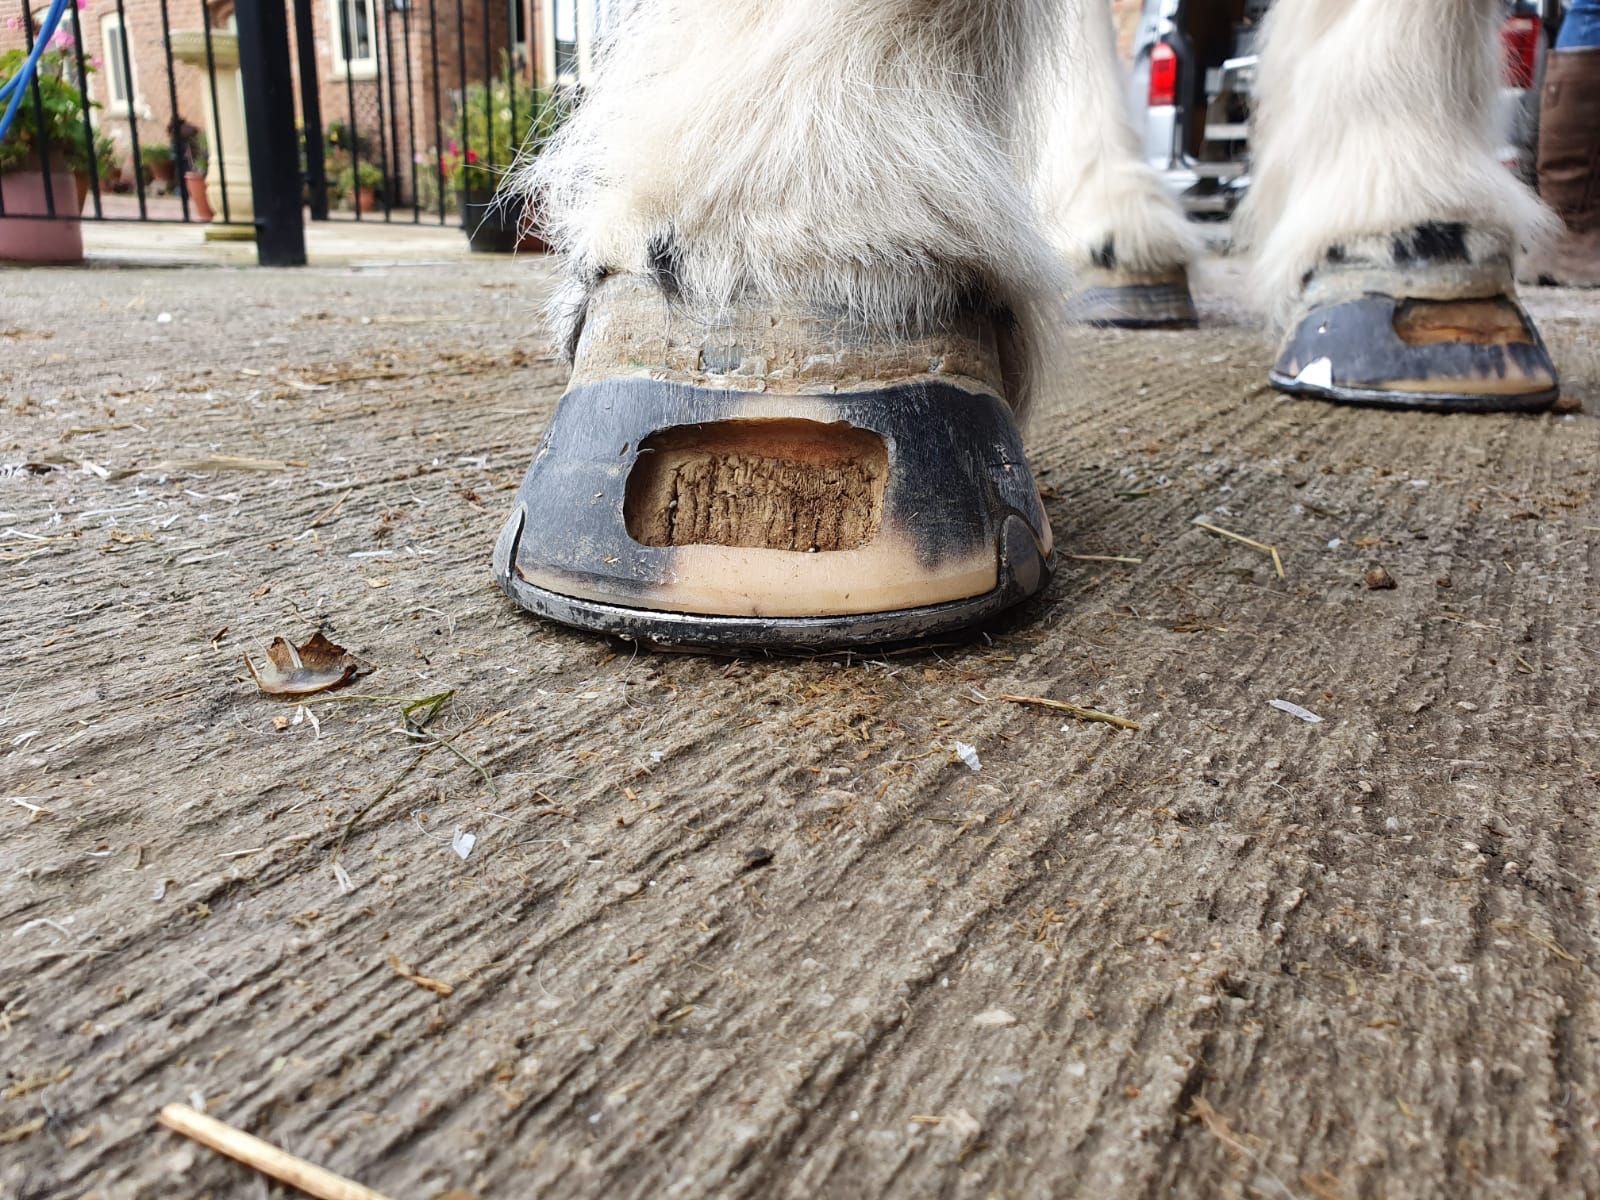
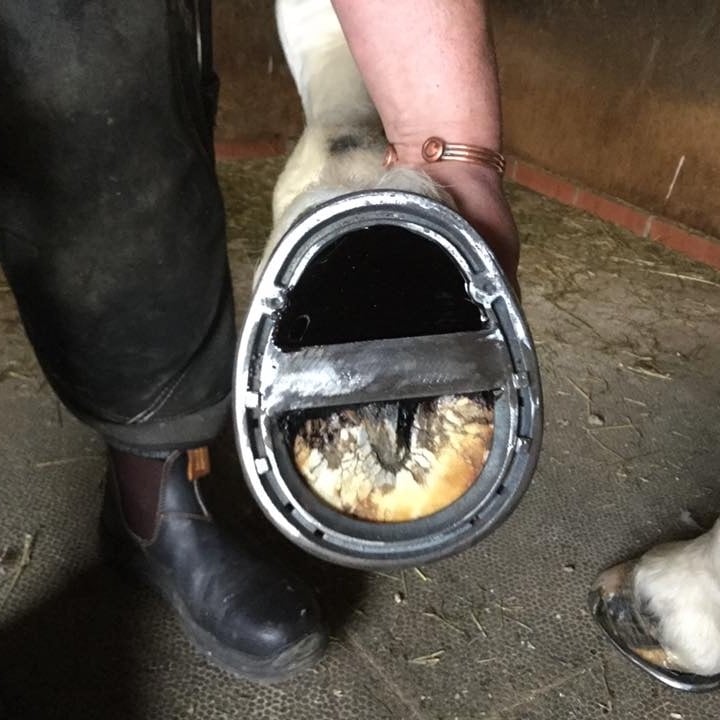
In this case we worked with the Vets from Home Farm Equine to carry out a dorsal wall resection in both front feet to release gas pockets caused by laminitis.
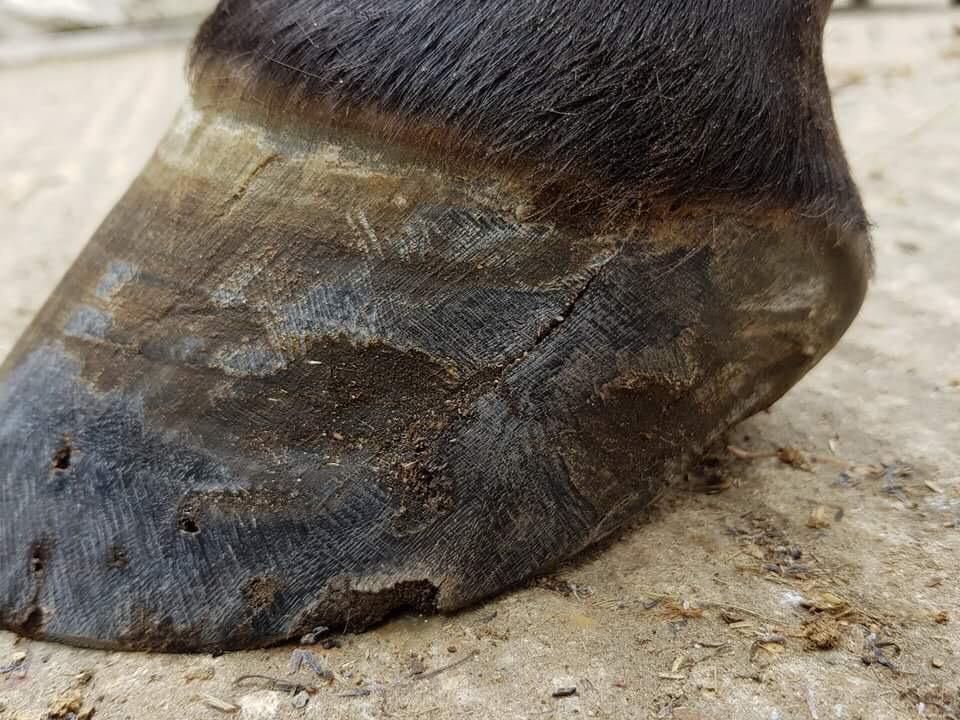
treating a vertical crack
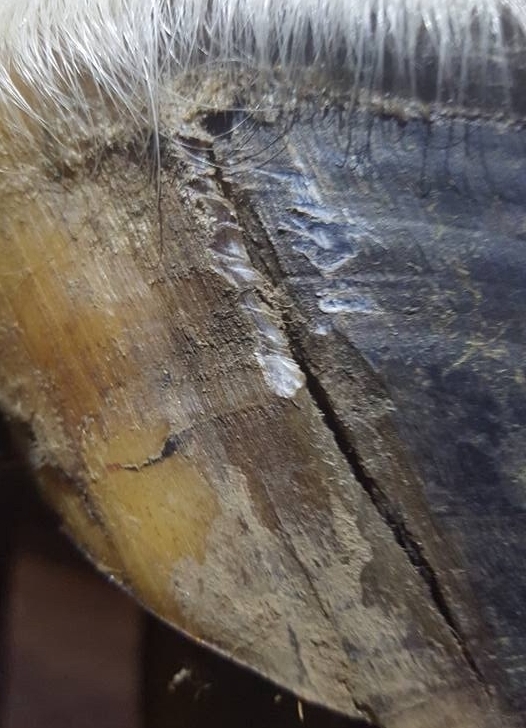
In this first photo you can see we have quite a nasty Vertical Crack in the hoof wall.
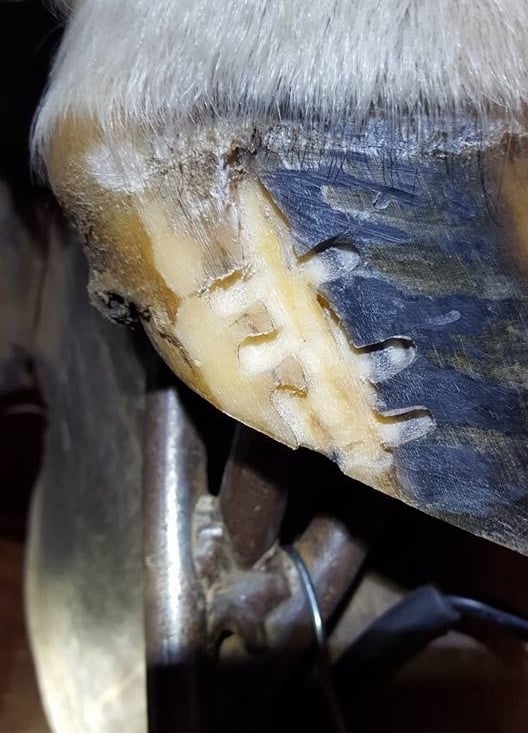
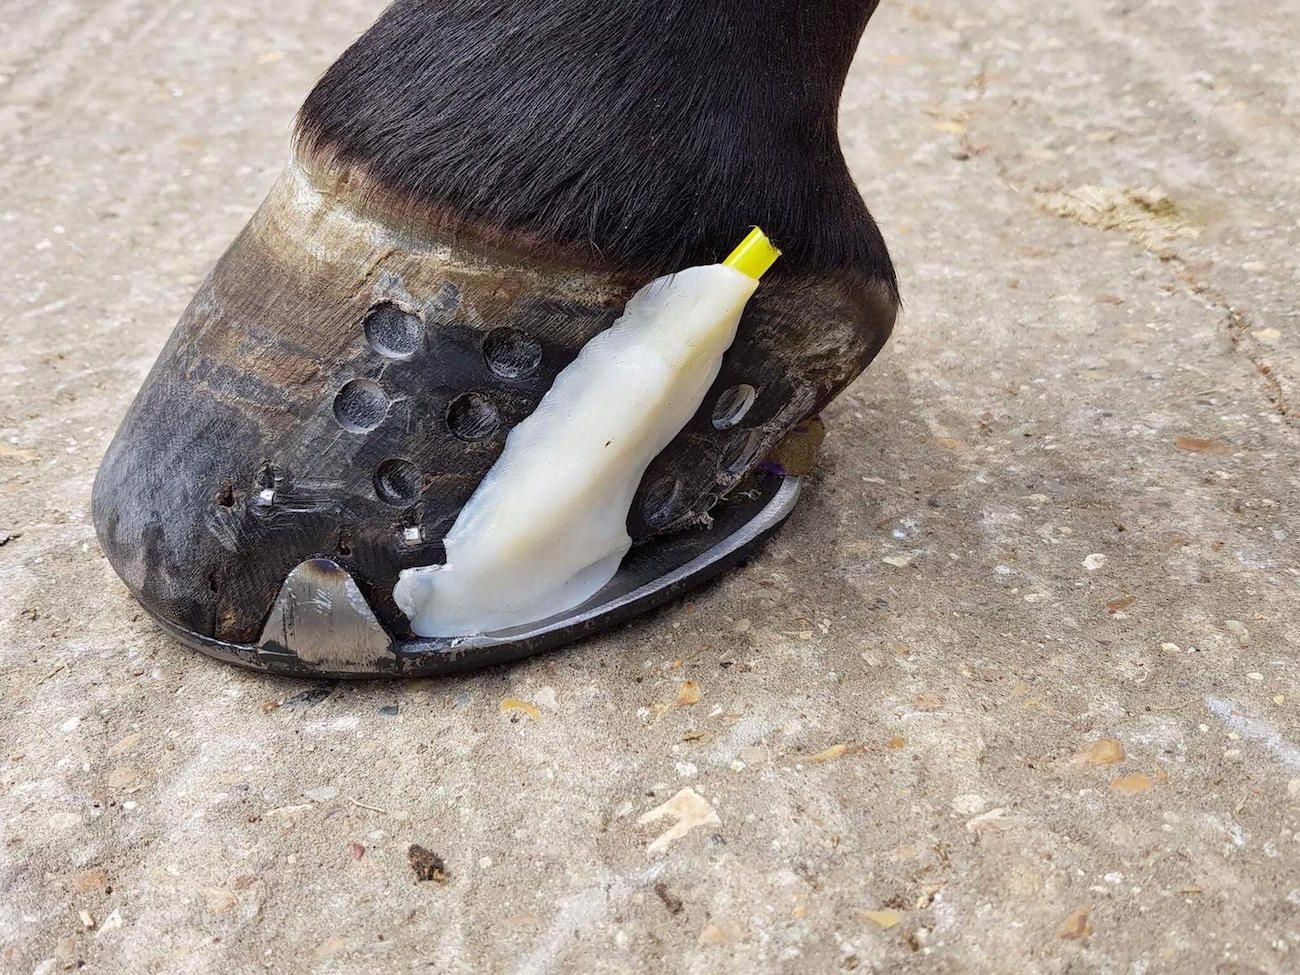
The wall has now been debrided and cleaned ready for the insertion of Imprint Hoof Repair granules.
When added to glue, the Imprint granules can be moulded to fill the crack...
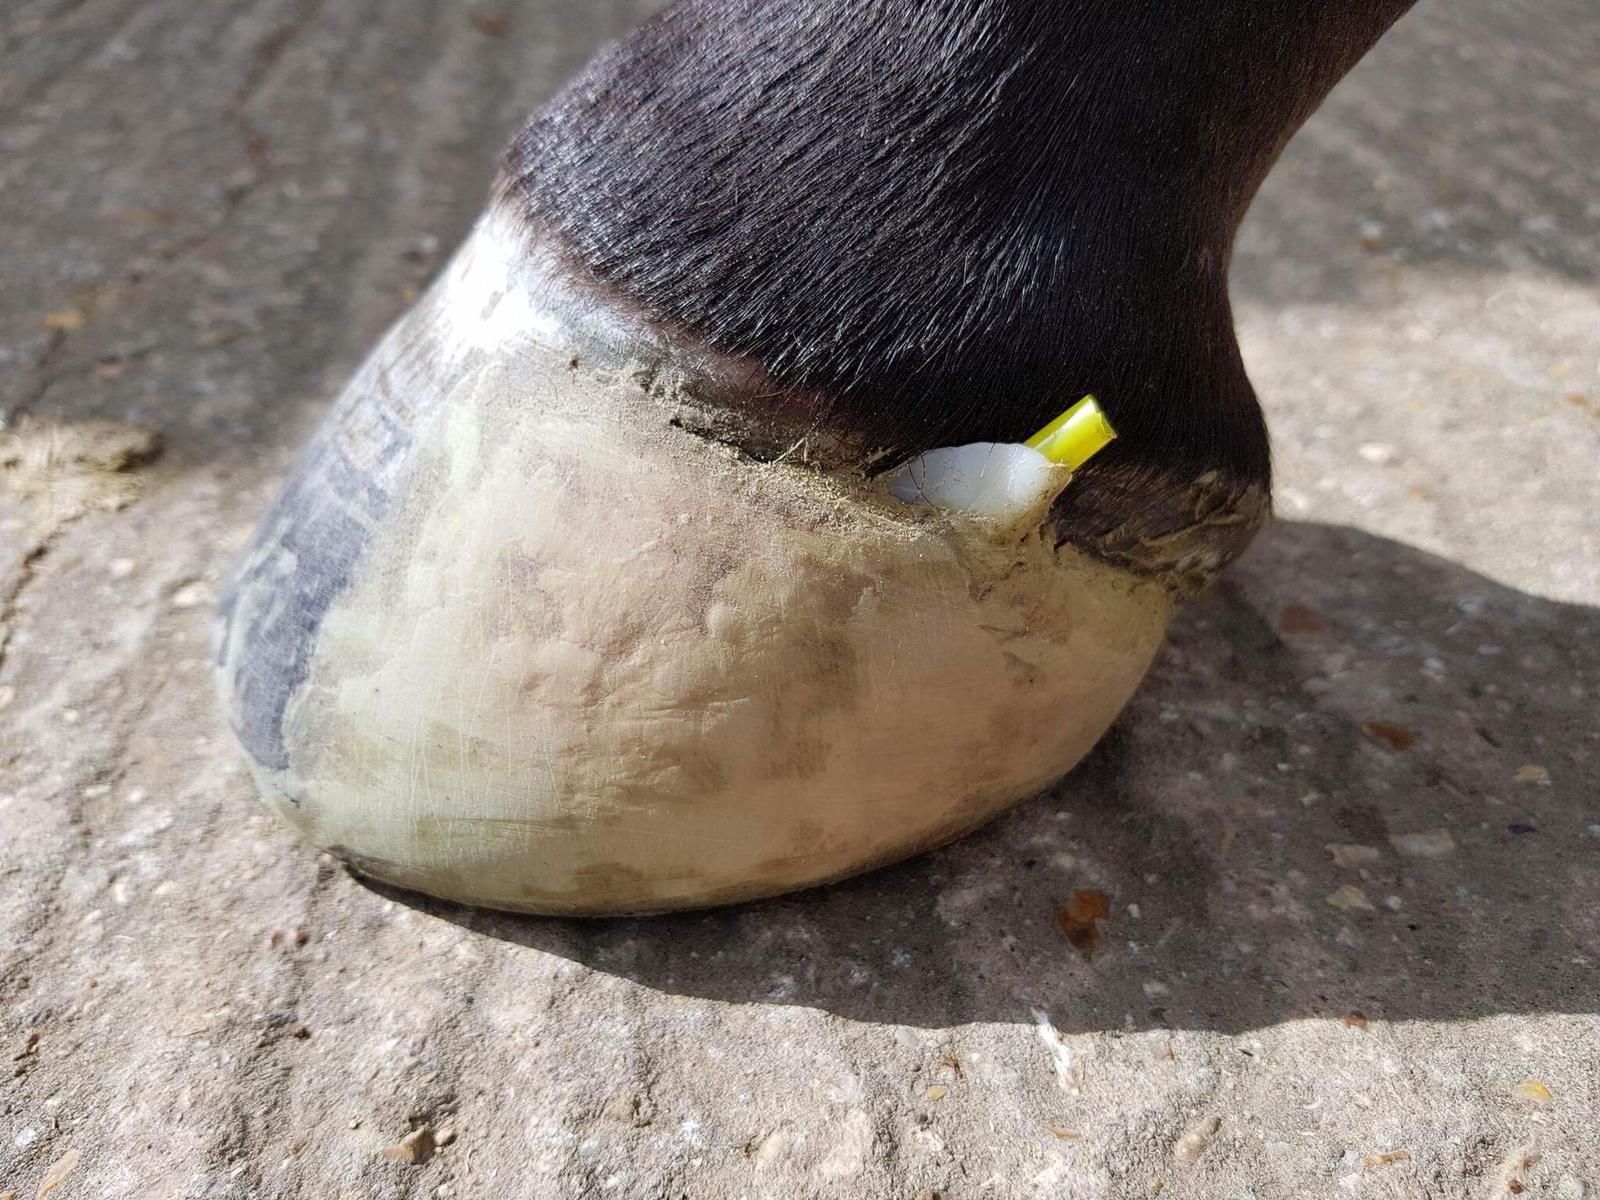
... and then rasped down for a tidy finish.
LATERAL EXTENSIONS
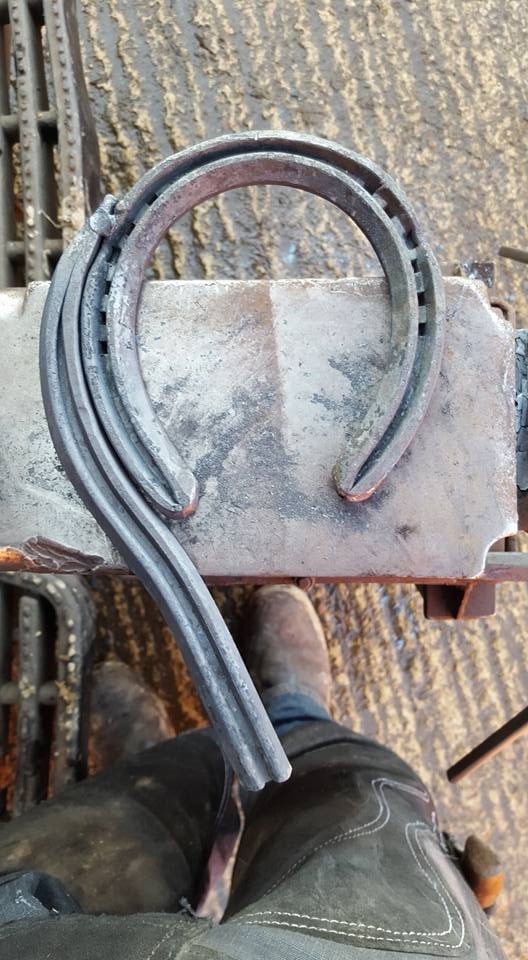
Here you can see the fabrication of the lateral extensions.
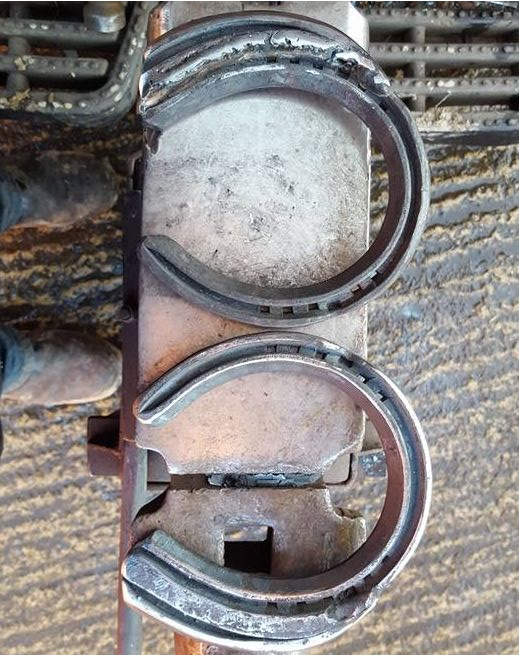
...and how the finished shoes look.
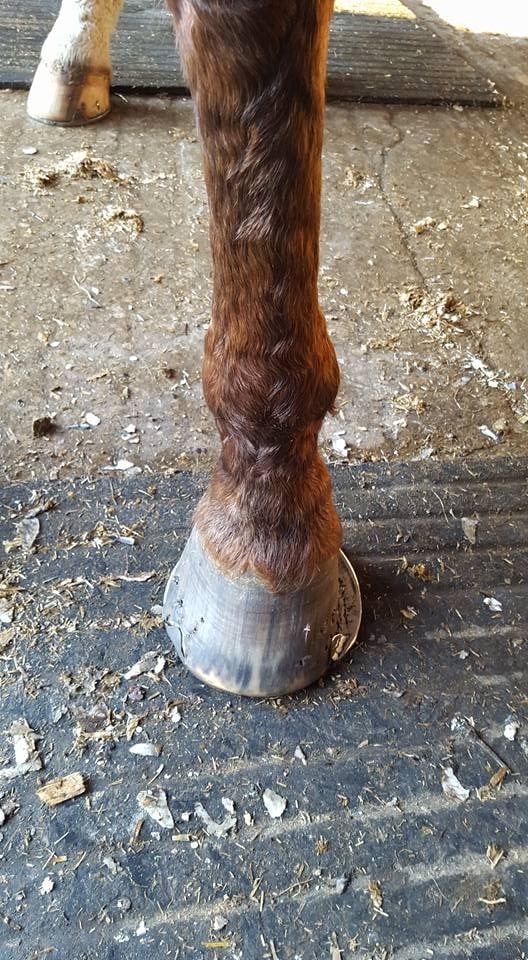
Now applied to the foot and prepared for filling.
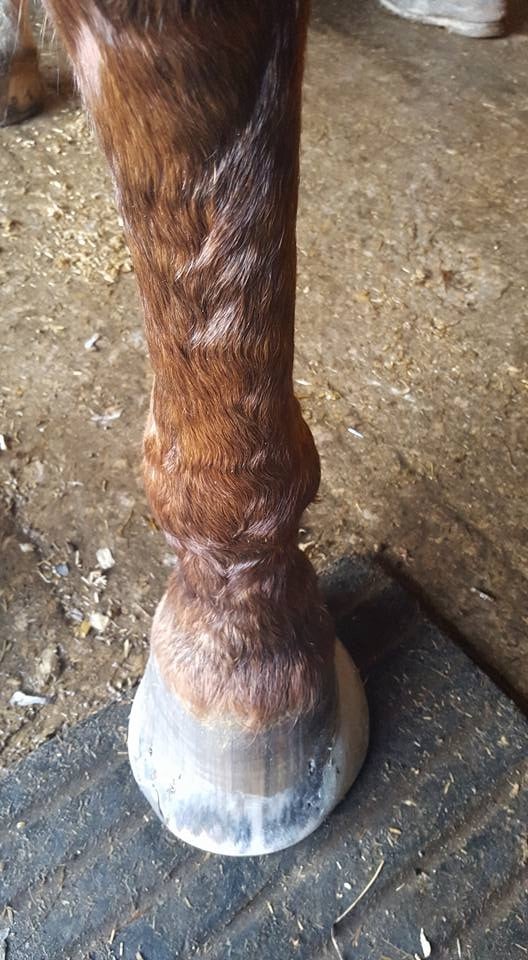
The shoe glue is then applied to build up the hoof and cover the extension.
removing a keratoma
This is me working with Mathew Barlow of Home Farm Equine to remove a small Keratoma from a client's pony.
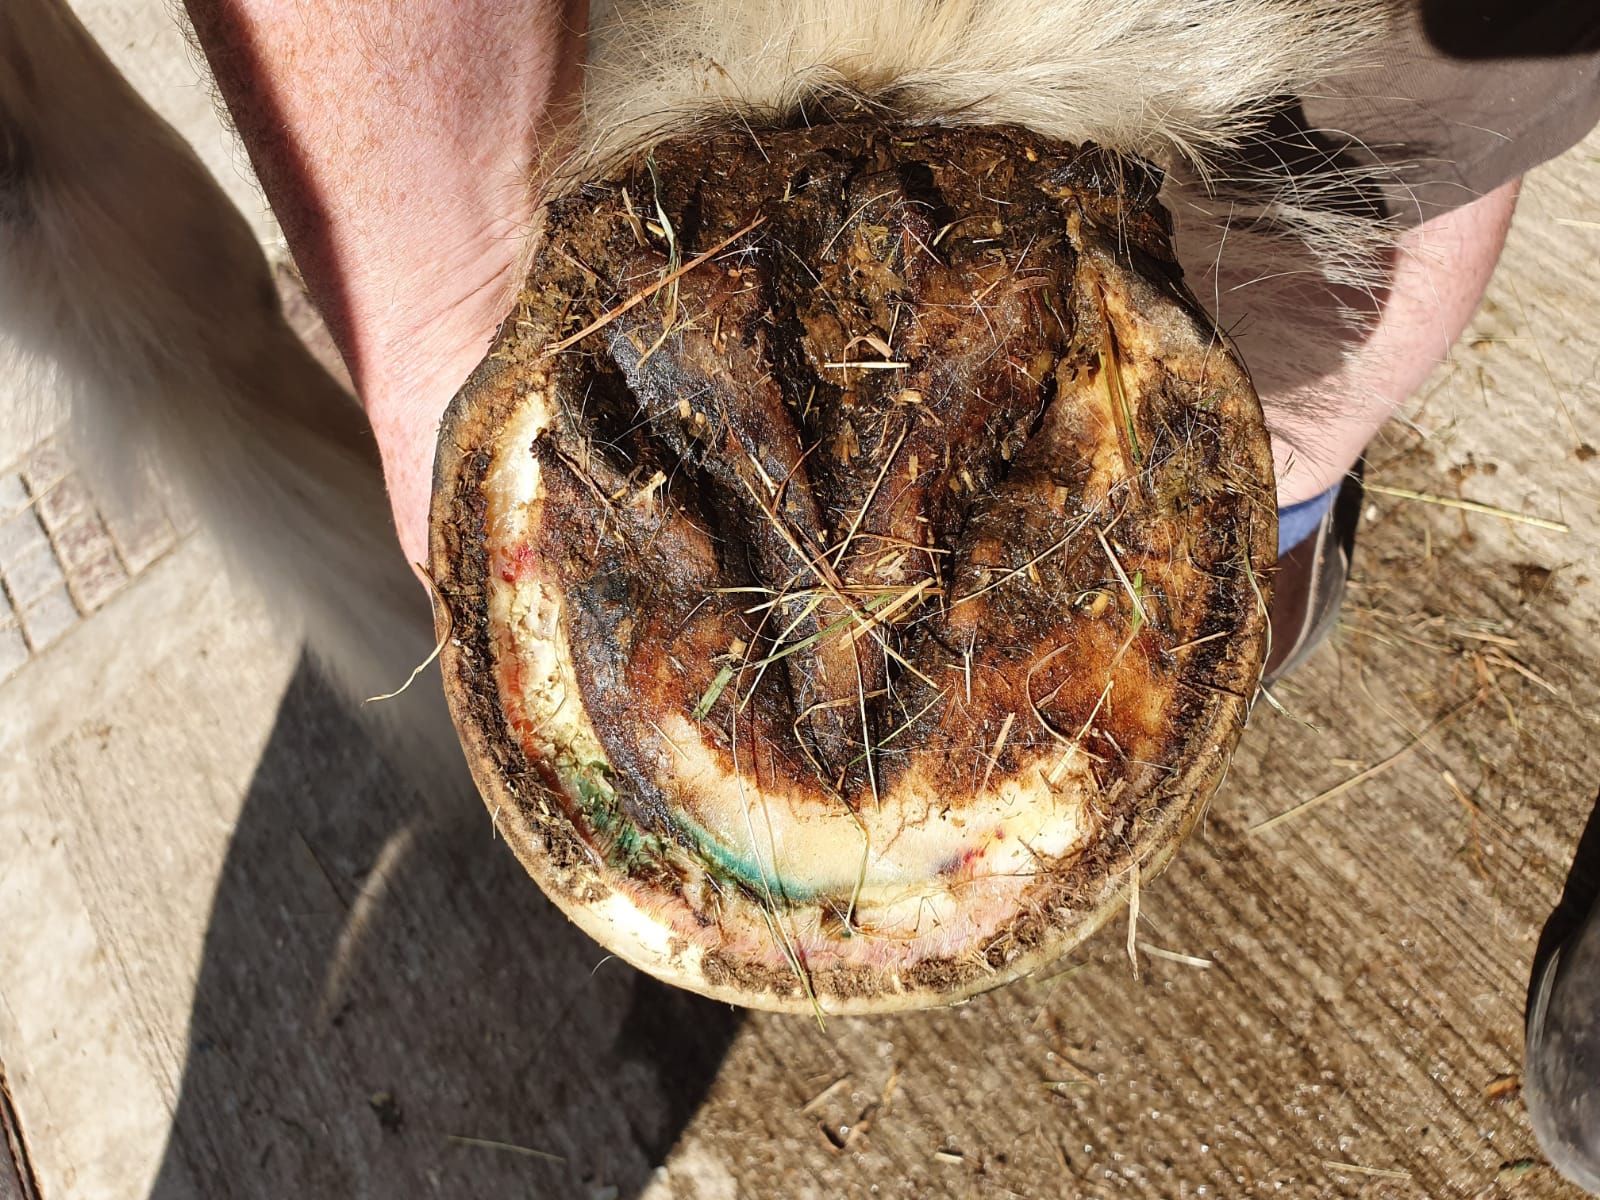
various cases
Here you can see how I made a Centre Bar Shoe adding Vettec firm pad material, giving caudal hoof support to a complex laminitic where direct frog pressure could not be achieved.
Here I fitted a Third Millennium Tractor Pad with P3 gel pack underneath. Used for support cushioning and protection.
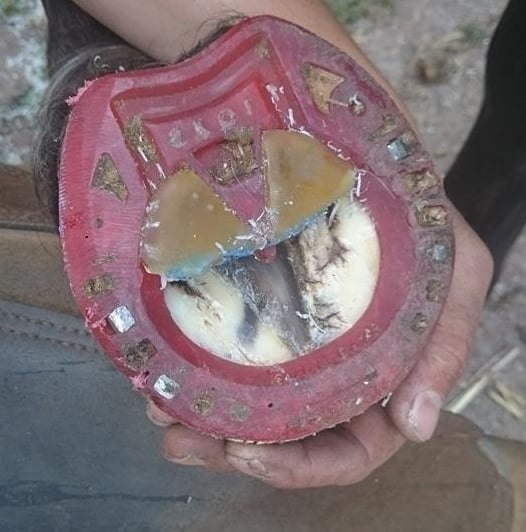
Here you can see an Equieze Plastic Bar Shoe with P3 caudal gel pack. The shoe has been graduated on the lateral side to encourage level footfall and even-weight bearing.
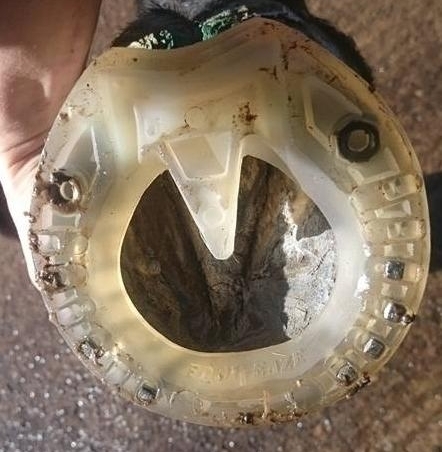
This is another Equieze Shoe this time with stud holes that was applied to an Eventer, giving flexibile support with less weight than a steel shoe.